Creating Custom Key Cutting Profiles on the Triton Key Machine
Feb 6th 2023
In this Tech Tip Article, we are going to discuss the creation of a Key Cutting Profile or “Code Card” as some refer to it. For this example, we are going to be working with a Triton Key Machine and the Ford HU198 Keyway. This Ford HU198 Keyway is an Internal 2 Track Keyway that started appearing on some Ford Vehicles in the European Market in 2017. Here in the US, we started seeing this Keyway in the 2020 Ford Escape (See Picture 1).
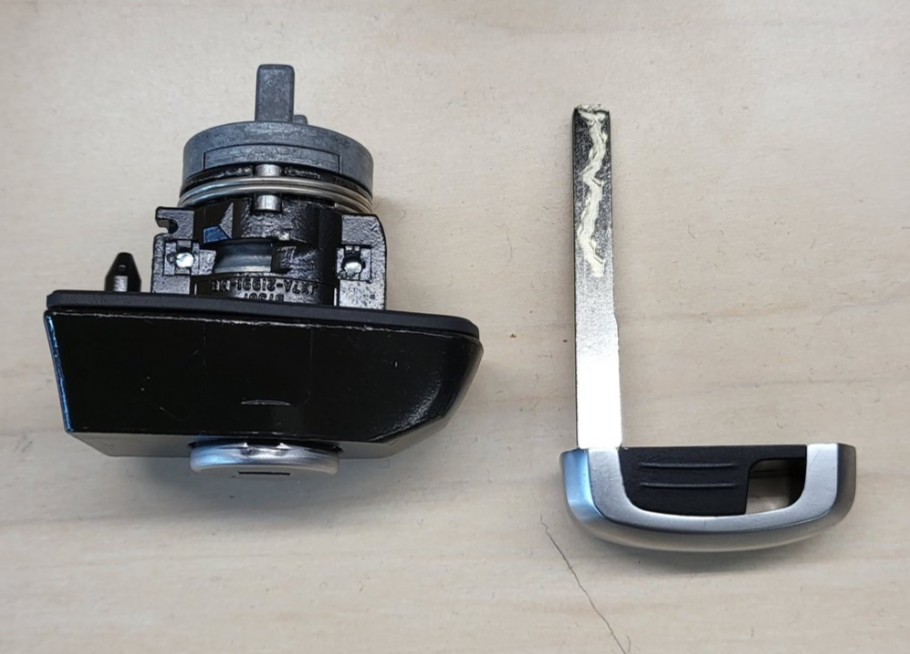
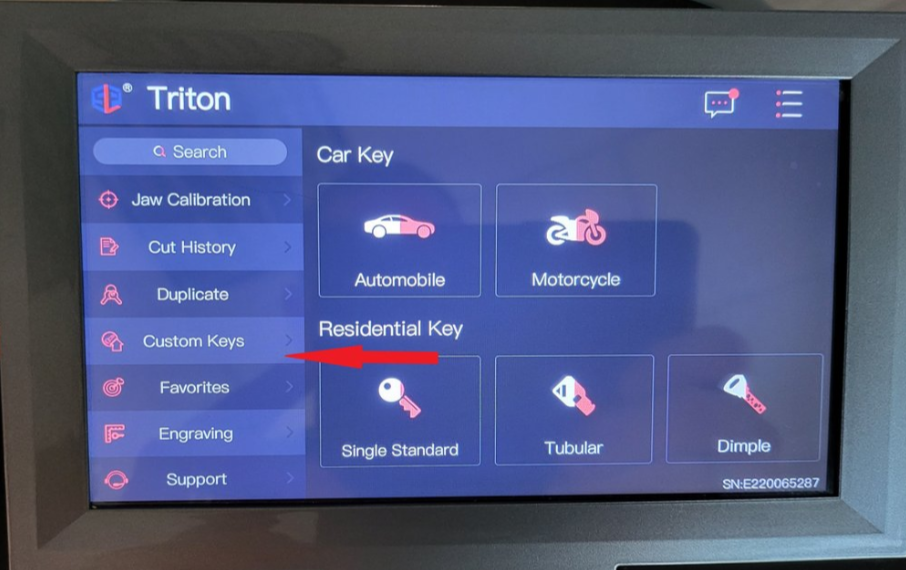
Other Ford Vehicles have since adopted this Keyway. The HU198 Keyway still uses a HU101 Test Key Blank but instead of External 2 Track Cuts this Keyway now uses Internal 2 Track Cuts. When a new Keyway appears like this, it takes some time for Key Machine Manufacturers to add the Cutting Profile to their Machines. If you happen to be using a Key Machine like the Miracle A9, which is based on InstaCode Cards, you don’t have to create a Cutting Profile like we are describing here, you just need to look up the Code Card Number associated with the new Keyway. But in the case of the Triton and many other Key Machines on the Market, which are not based on InstaCode Cards, you would need to create a Custom Key Cutting Profile on your Machine to originate a key to this new Keyway. Here are the details on how to do this on the Triton Key Machine. From the Main Menu of the Triton click on “Custom Keys”
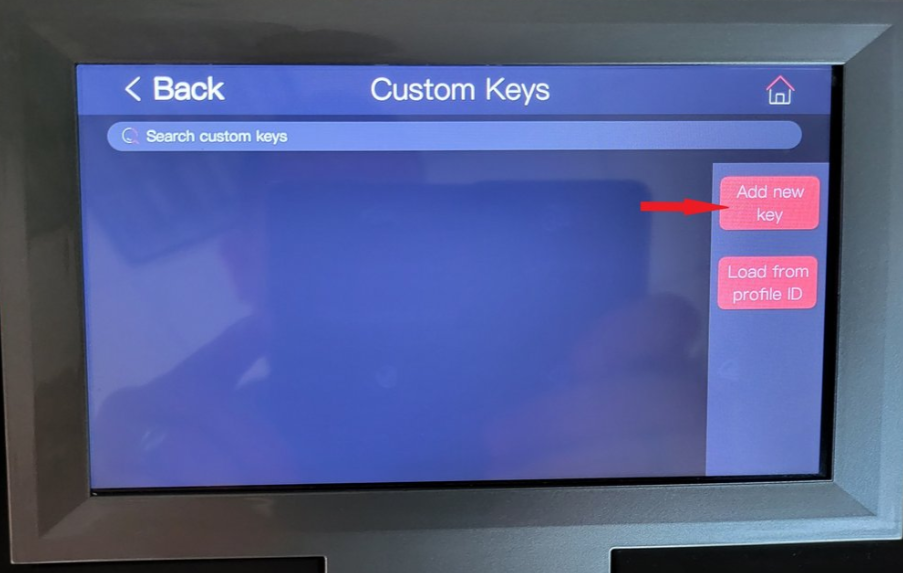
Next from the Custom Keys Menu click on “Add New Key” (See Picture 3).
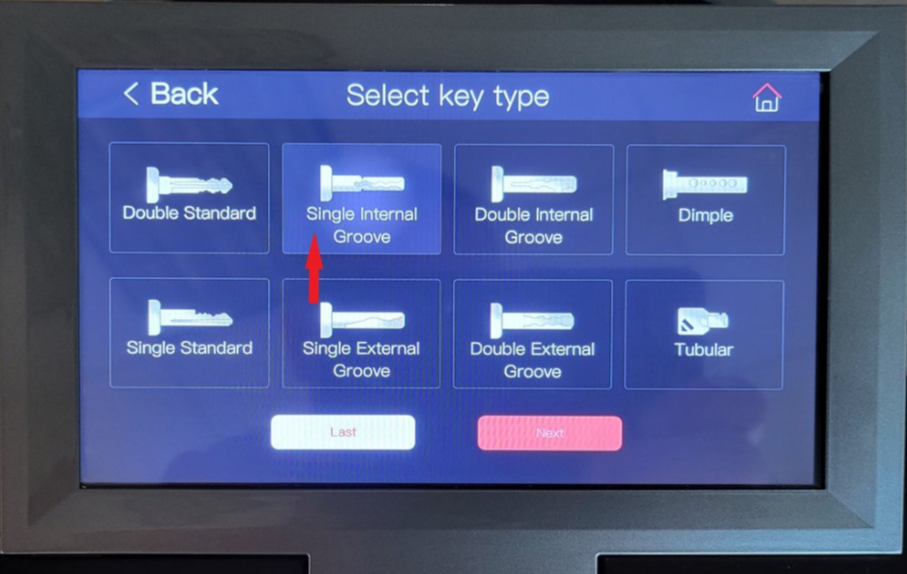
On the Select Type Menu click on “Single Internal Groove” (See Picture 4).
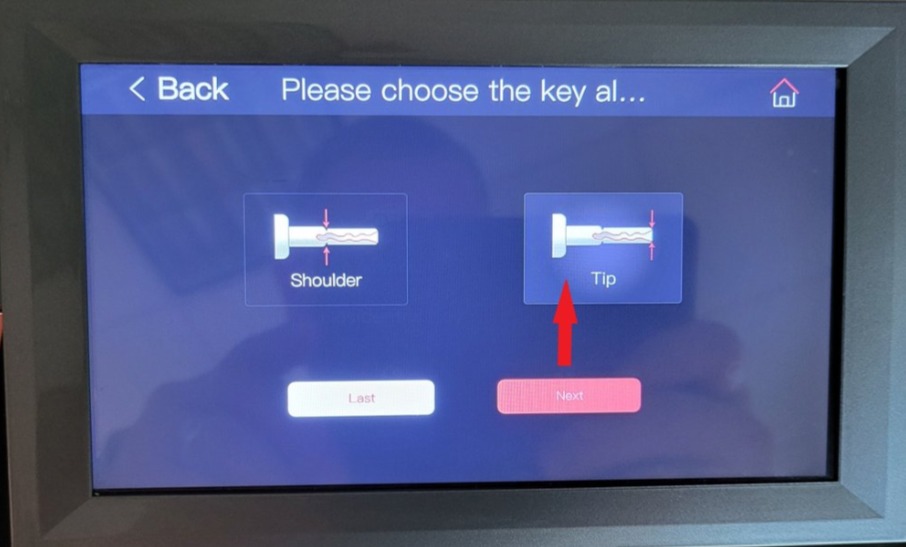
From the next Menu click on “Tip” (See Picture 5).
You will need to enter the Spacing Information for the Keyway you are working with on the Space Location Menu. This information can be found in several different places. InstaCode or GeneriCode are two of the easiest places to find this information. Before entering the spacing information of this Keyway you will need to click the “+ Button” until you have all 10 spaces available where you can enter data into them (See Picture 6).
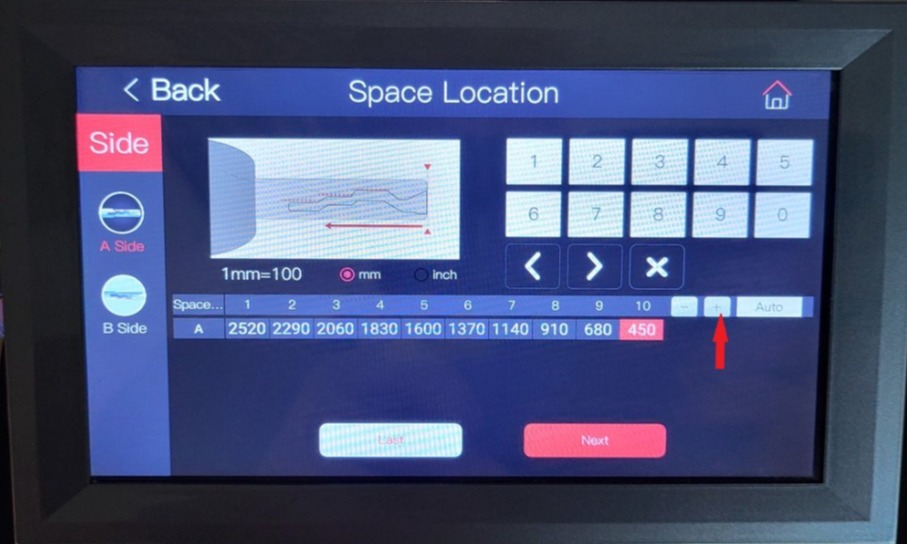
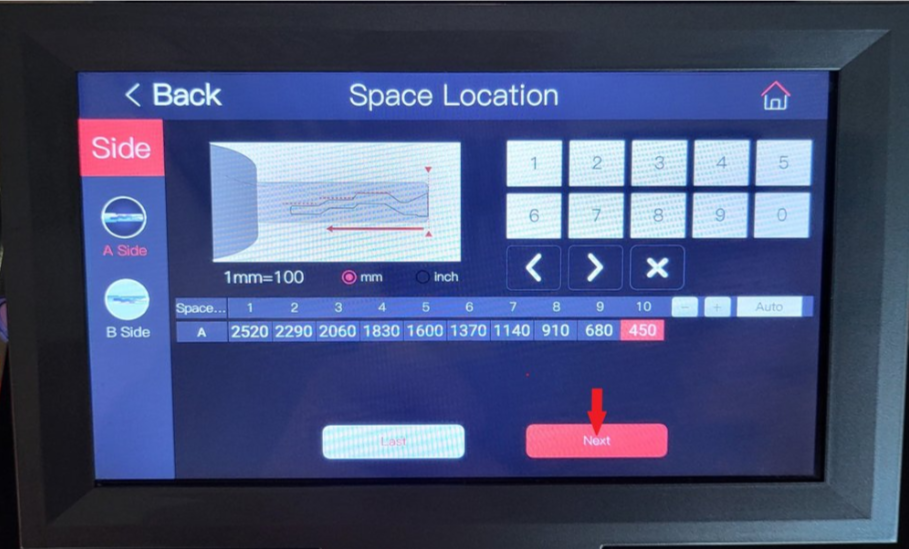
By default the Triton only has 5 spaces enabled so you will need to press the “+ Button” five more times to enable the other 5 spaces. Once you have all 10 spaces enabled enter the data into each space that you got from InstaCode or GeneriCode and then click on “Next” (See Picture 7).
On the Space Width Menu enter the data that you got from InstaCode or GeneriCode into all ten spaces and click “Next” (See Picture 8).

On the Depth Menu again enter the data that you looked up into the 5 space locations and click on “Next” (See Picture 9).

In the next Menu, you will need to enter the specs on the actual key blank itself. Enter the obtained data into each field and click on “Next” (See Picture 10).

On the next Menu select the proper clamp for the Key Cutting Profile you are creating (See Picture 11).

If you are unsure which clamp to select, you can experiment with this in another application and change the Key Cutting Profile later. After selecting the proper clamp please click on “Next” (See Picture 12).

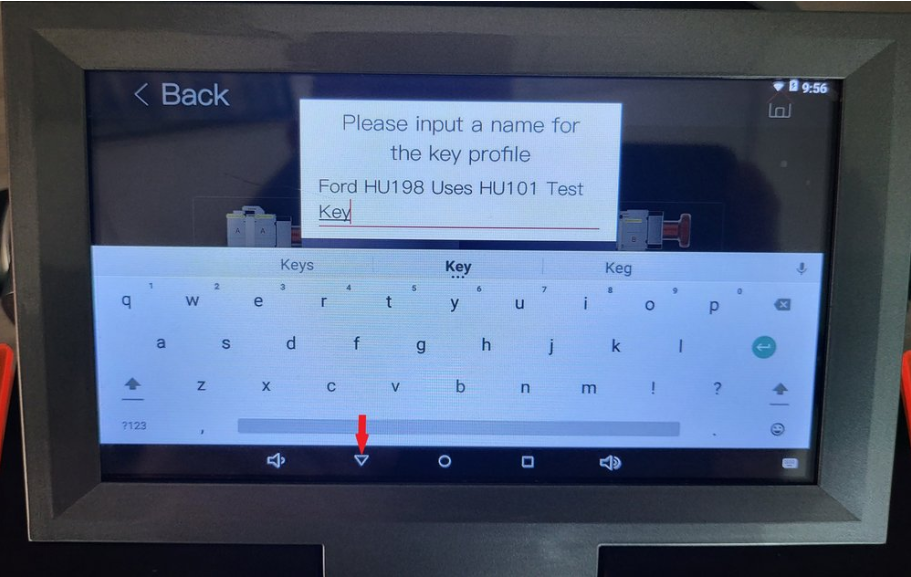
Lastly, we need to enter a name for this new Key Cutting Profile. We recommend a detailed name so that you can easily remember what was created. Once you typed in the desired name click on the “Down Arrow” to minimize the keyboard (See Picture 13).
Once the keyboard has been minimized you will see the “OK Button” which when clicked will save the Key Cutting Profile with the entered name (See Picture 14).

Once you click on the OK button you will be taken back to the Custom Keys Menu and you will now see the Key Cutting Profile that you created (See Picture 15).

Once you have completed this task you will be able to use this new Key Cutting Profile, in the future, by navigating to the Customer Keys Menu and clicking on the created Key Profile.
We hope this Tech Tip has been helpful to you. Stay tuned for our next Tech Tip. If you have any requests for Tech Tip articles or if you have questions about this Tech Tip Article please email us at info@keyinnovations.com.


